
Why Primer Matters When Painting Furniture: What This Hutch Taught Me
When you’re refinishing furniture, primer can feel like one of those steps that’s easy to skip.
Sand the piece, clean it up, spray on some paint, and move on. Faster, simpler, done.
I used to think that way too.
But the more furniture I’ve refinished, the more I’ve realized that primer can make the entire painting process easier and give you a much more consistent finish.
My latest hutch project was a perfect example.
Starting With a Worn Finish
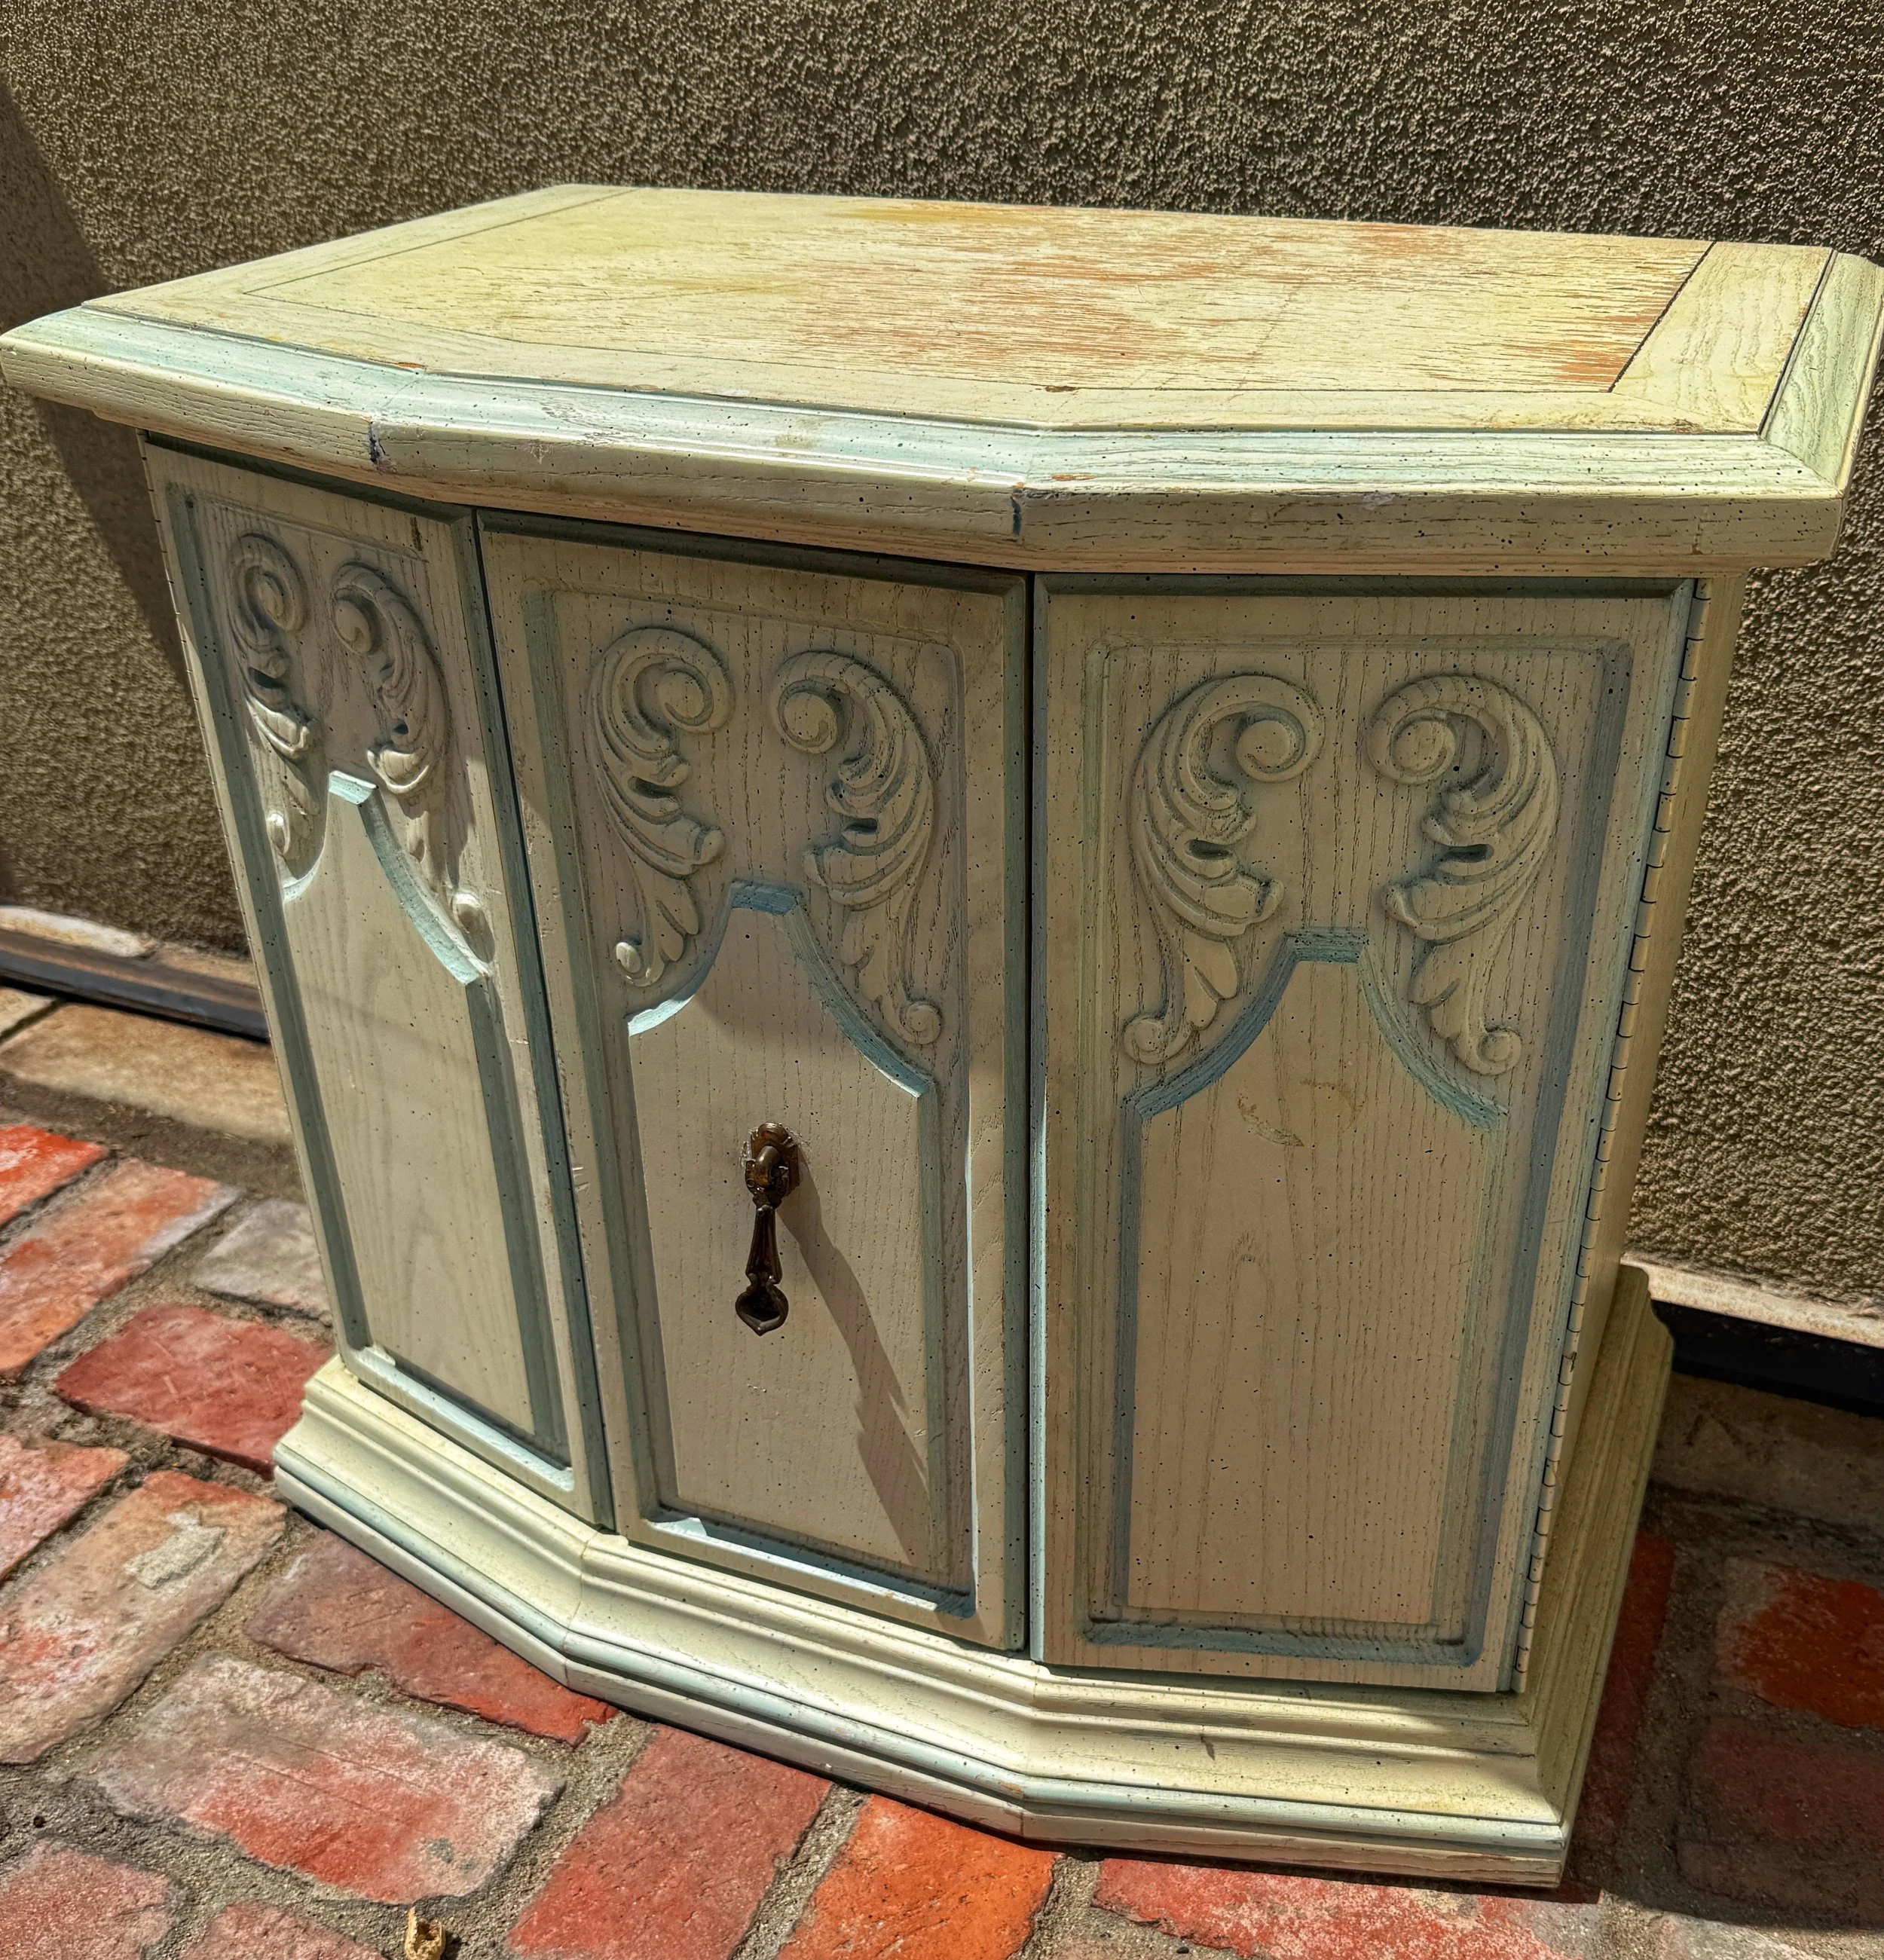
When I picked up this hutch, it had definitely seen better days.
The original finish was heavily worn, especially across the top, with scratches, discoloration, and areas where the old finish had deteriorated.
Once I decided to give it a clean satin white finish with black hardware, I knew the surface needed a solid foundation before paint.
That meant sanding, cleaning, and priming.
Why Not Just Paint Over It?
You can paint furniture without primer in some situations, but older furniture can come with a lot of unknowns.
There may be stains, oils, repairs, bare wood, or uneven areas hiding underneath the existing finish. Even after sanding, those surfaces may absorb paint differently.
That can lead to:
Uneven coverage
Discoloration
More coats of paint
Poor adhesion
Stains bleeding through
A less consistent final finish
Primer helps create a more uniform surface between the old finish and the new paint.
That was especially helpful on this hutch because the original surface was anything but uniform.
Primer Makes the Paint Work Better
One of the biggest misconceptions about primer is that it’s just another coat.
It really isn’t.
Primer is designed to bond to the prepared surface and give the finish paint something consistent to adhere to.
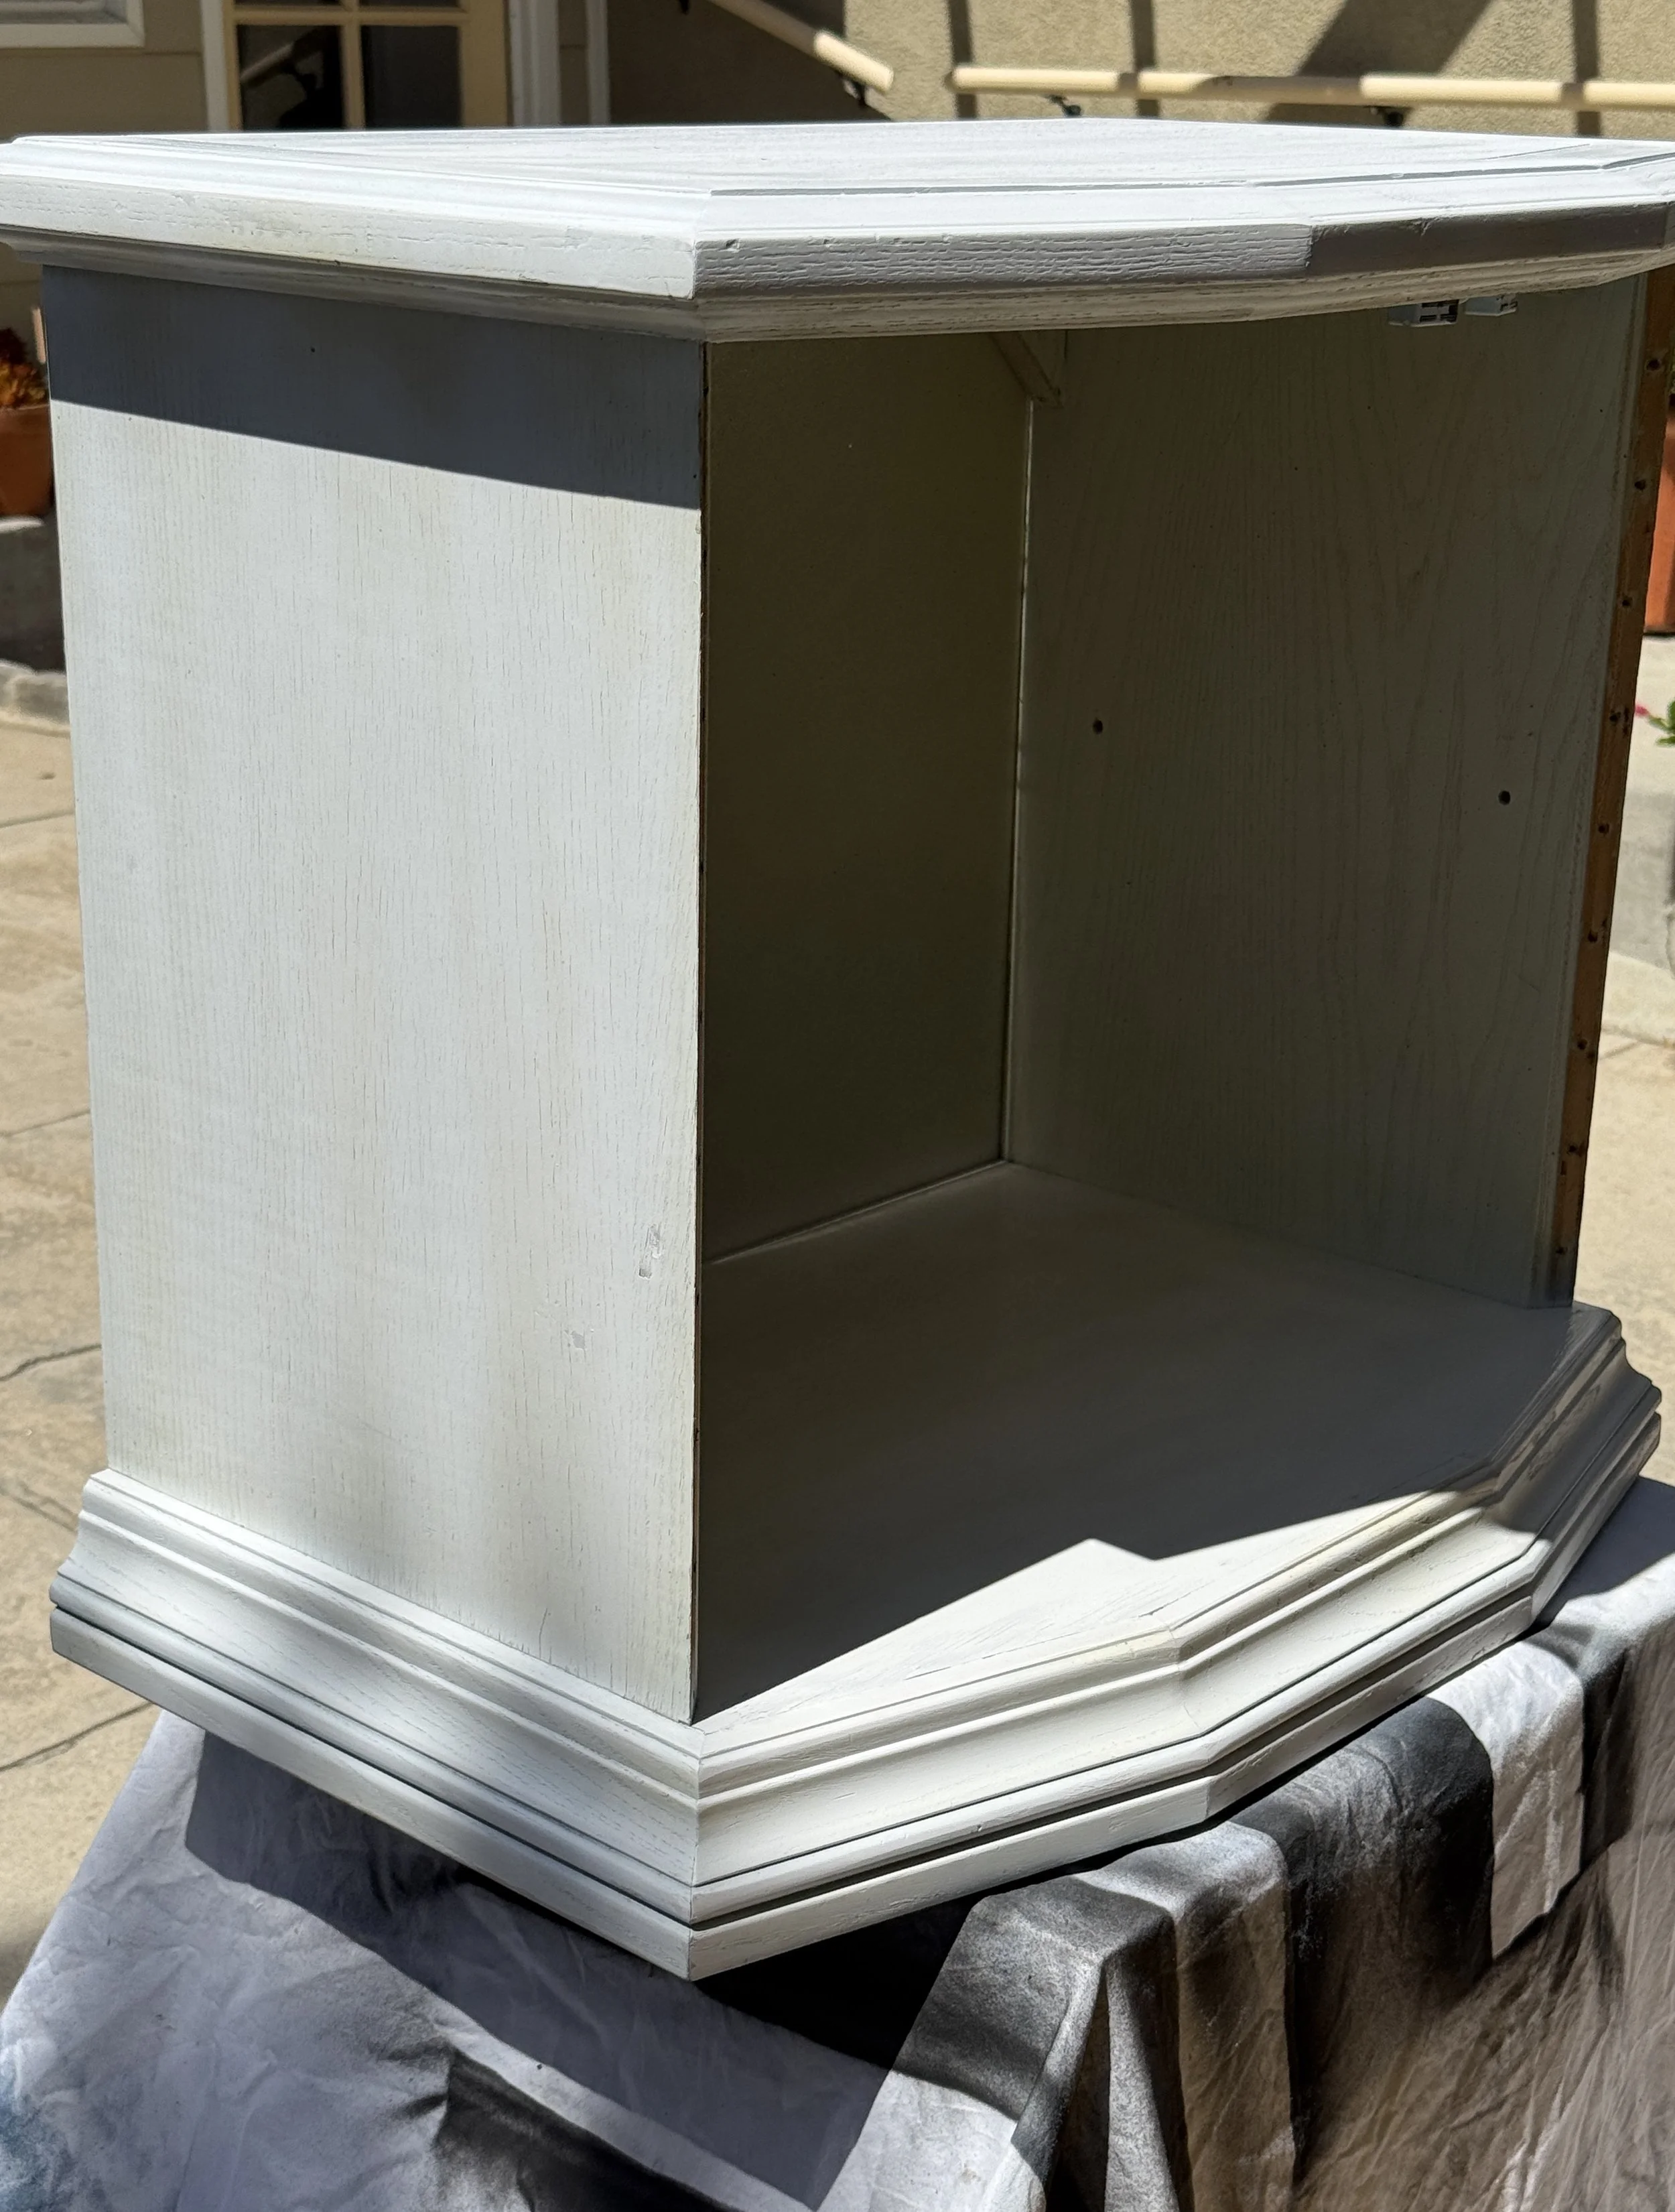
After sanding the hutch and removing the dust, I applied primer before moving on to the satin white paint.
The primed surface immediately made it easier to see imperfections and gave the final paint a much better starting point.
Instead of asking the finish paint to do all the work, the primer handled the foundation first.
Primer Can Reveal Problems
Another benefit of primer is that it can expose imperfections you didn’t notice before.
Small scratches, rough sanding marks, dents, or uneven areas often become much easier to see once the piece is covered in one consistent color.
That’s exactly when you want to catch them.
It’s much easier to lightly sand or touch up an area before the final paint goes on than it is to fix the problem after the piece is already finished.
I had a few areas on this hutch that needed additional attention as the project progressed, which is completely normal.
Furniture refinishing rarely goes perfectly from sanding straight to the final coat.
Preparation Still Matters
Primer isn’t a replacement for proper preparation.
My basic process is still:
Clean → Sand → Remove the dust → Prime → Paint
The sanding helps smooth out imperfections and gives the coatings a better surface to bond to.
I also make sure to remove the sanding dust before applying anything else. I typically use microfiber cloths for this rather than tack cloths.
Once the surface is clean and properly prepared, the primer can actually do its job.
The Finished Hutch
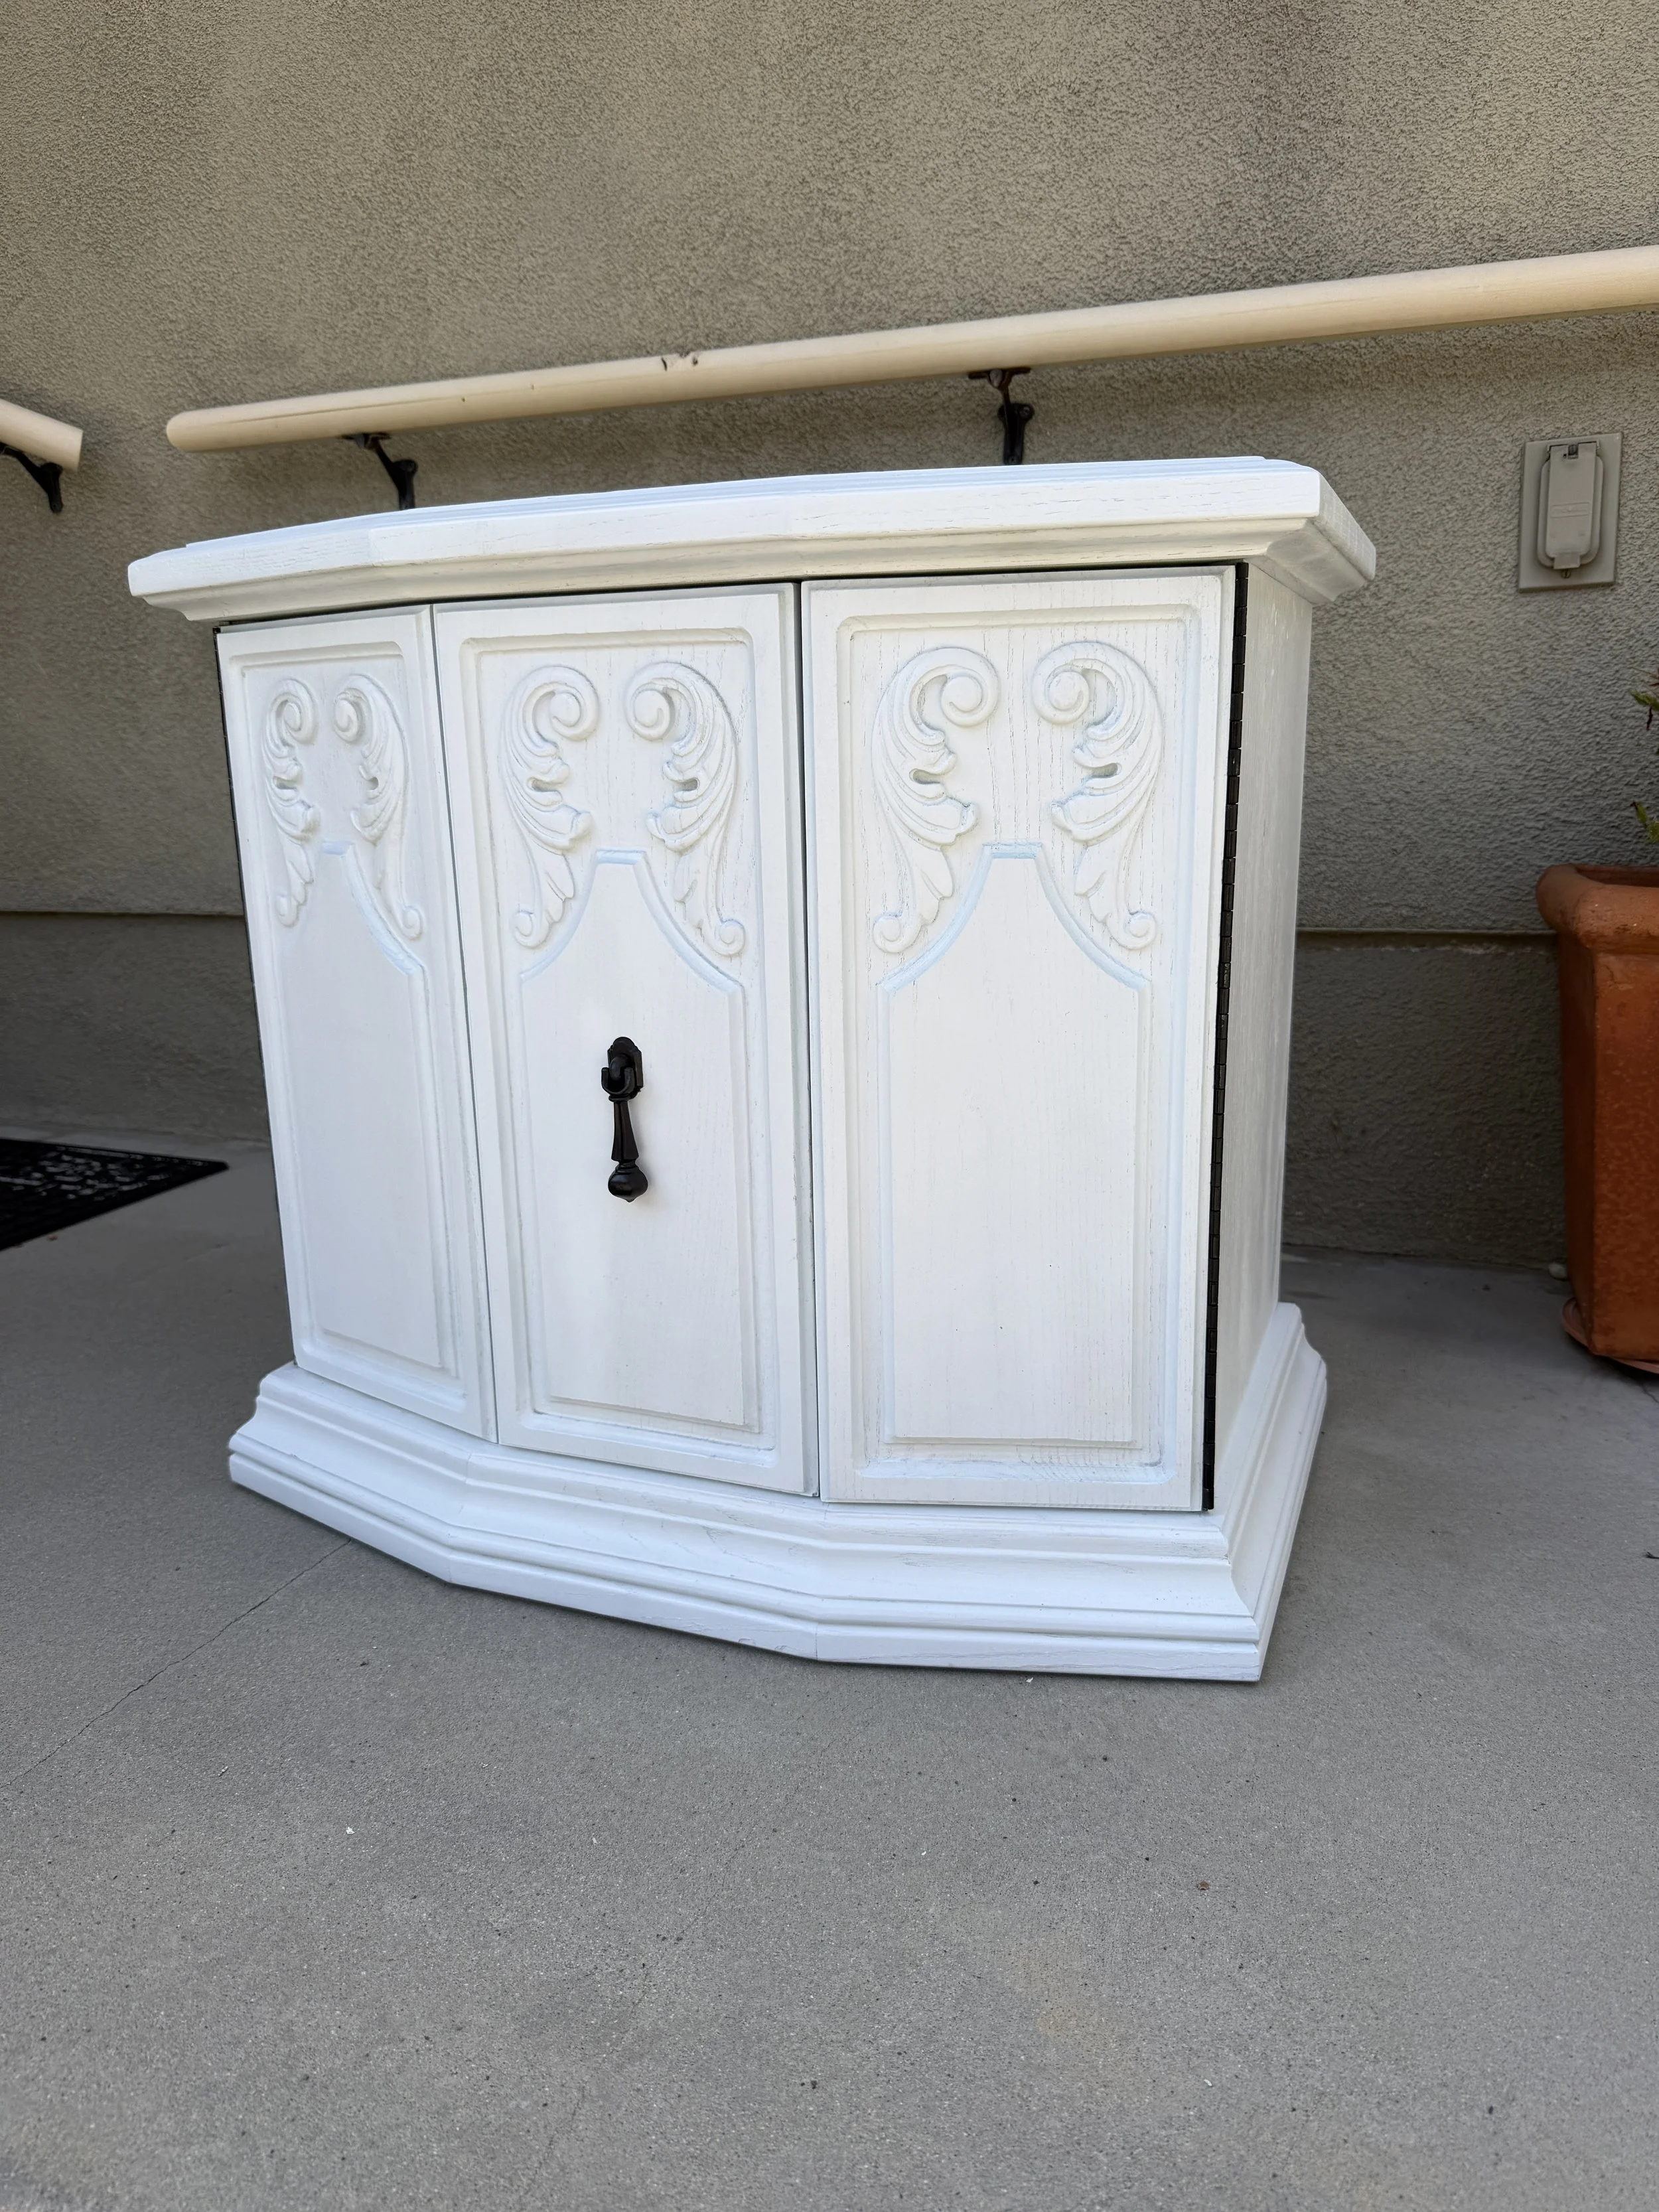
After primer, satin white paint, touch-ups, and reassembly, the hutch looked completely different.
I kept the design simple with a clean white finish and contrasting black hardware.
The final paint gets most of the attention in the finished photos, but a lot of what makes that finish look good happened before the paint ever went on.
That’s the biggest lesson from this project.
Skipping primer might save a little time at the beginning, but it can create significantly more work later.
For me, primer has become a normal part of the furniture refinishing process because it improves adhesion, creates more consistent coverage, and gives me one more chance to catch problems before the final finish.
Good paint helps. Good preparation matters more.
Follow the Next Upwood Project
I’m documenting more furniture refinishing projects, tips, mistakes, and before-and-after transformations as I continue building Upwood Industries.
Follow along on Instagram and YouTube to see the next project from start to finish, and check back here for more furniture refinishing guides and project breakdowns.